Showing posts with label From Kat's Kitchen. Show all posts

Tuesday, July 2, 2013

Peach and Mango Salsa -- RECIPE!

Pretty sure that if you made me say a very favorite food it would be chips and salsa. {yes, I know thats two foods technically. I'm sneaky like that!} And because I love salsa so very much, I am a big fan of this summery Peach and Mango salsa. It is sweet and refreshing and can be adjusted easily to your taste. Give it a try for your 4th of July get together!
4 Fresh Peaches, peeled and diced
1 Fresh Mango, peeled and diced
Half of a Red Onion, finely diced
2 Plum Tomatoes, peeled and diced
1 Small Red Pepper, diced
Fresh Cilantro
Juice from 1/2 of a Lemon
Juice from 1/2 of a Lime
Dash of Cayenne Pepper or finely diced jalapeƱo {if you like a kick!}

Dump everything together and let it sit for a couple hours in the fridge before serving! YUM-O!


Pin It!

Thursday, June 27, 2013

Pineapple Chicken Verde

Hello there!

I've been busy chasing a toddler and enjoying summer... and making quick suppers. Here is a yummy one we had earlier this week:

Pineapple Chicken Verde
It was based on this recipe from The Gracious Pantry, and I just made a few adjustments. It was SO easy, and yummy, and very healthy.

Jay and I have been doing a month of clean(er) eating and gluten free. And when I say "we" I mean I have been doing it, and Jay has been supportive and trying really hard. Bless his heart. But seriously the boy's life is utter chaos most of the time, and he eats fairly well for it to be so. Still working on that...

Anyway, I have actually loved eating gluten free. Well, kinda loved it... basically it has been wayyyy easier than I expected, and I really do feel better. I decided that I consume too much junk in the form of granola bars and crackers, and claim to be "eating healthy" just because I didn't eat a cookie or a bag of chips. All that flour tt still turns right to sugar in my body, and the more I would eat, the more I would crave bread! Its been a detox month I guess. Anyway, I have been taking the time to choose fruits and veggies as snacks... and lots corn tortilla chips. This girl can't live without her chips and salsa! A tiny step in moving towards an unprocessed lifestyle....

SO, this recipe fit the bill, and was just a dump everything in the crock pot lifesaver! My adorable toddler likes to hit-the-wall around 5:30 when its time to fix dinner, and demands an abundance of books be read to her in the 30 minutes it takes to make dinner. Enter the crock pot! WOO HOO!

Now for this recipe...

3 Chicken Breasts
1 Cup Verde (Green) Salsa (mine was from Trader Joes)
1 Cup Crushed Pineapple (in real fruit juice!)
1 Red Bell Pepper (Sliced up thin)
Diced Jalapeno
Quinoa

Now for the hard part... dump everything into the crock pot, except the quinoa, and cook on low for 4 hours! Perfect thing to get started during nap time!

 Shred the chicken with two forks after about 4 hours and make your quinoa based on package directions.

Serve chicken mix over quinoa. We also had a yummy summer salad.

It was great re-heated for lunch the next day too. Hope y'all love a quick, healthy meal as much as we do!

AND, if anyone has an gluten free, easy recipes they love... please share!


Pin It!

Wednesday, April 3, 2013

Fun {and Cute!} Vistors & Peanut Butter Oatmeal Bars

This cutie and his Mama and Daddy came for a visit last week. 
Man, it was so fun to catch up. Wish they didn't live all the way in Colorado... Work on that will you Katie!?
These two had fun playing together too!

Good friendships are so refreshing to my soul! Thanks for swinging by our tiny little town :)

While they were here I made these yummy brownies... and then I ate too many of them, and then I had to take them to Chick-fil-A. Whew, addictive!
Peanut Butter Brownie Bar Layer:
1/2 Cup Crisco
1/2 Cup Sugar
1/2 Cup Brown Sugar
1/3 Cup Peanut Butter
1/2 tsp Vanilla
1 Egg
1/4 Cup Milk
1 Cup Flour
1/2 tsp Baking Soda
1/2 tsp Salt
1 Cup Quick Cook Oatmeal

Cream together Crisco, Sugars, Peanut Butter, Vanilla, Egg, and Milk. Whisk together dry ingredients and add to the sugar mix. Stir in the oatmeal and pour into a greased 13x9 inch pan. Bake at 350 for 20 minutes. Cool completely.

Chocolate Icing:
2 Cup Powdered Sugar
1/4 Cup Cocoa Powder
3 Tbl Melted Butter
3 Tbl Boiling Water
1/2 tsp Vanilla

Mix Sugar & Cocoa. Stir in butter, water, and vanilla. Beat until smooth and spread over brownies.

White Drizzle Icing:
2 Tbl Melted Butter
1 Cup Powdered Sugar
3/4 tsp Milk

Heat butter in saucepan until golden. Mix with sugar and milk. Mix and drizzle over Chocolate icing.

Enjoy!


Pin It!

Friday, October 26, 2012

Butternut Squash, Quinoa, & Black Bean Chicken Stew - RECIPE!

This stew is yummy, healthy, and pretty easy! I ran across THIS recipe on Pinterest and felt a little intimidated at first... but I decided to switch up a few ingredients, and had a butternut squash I wanted to use. I loved how it turned out! 

So don't feel overwhelmed with all those healthy ingredients. Give it a try! I am sure the original recipe would be excellent too, but here is my version:

Ingredients
1 1/2 lb Butternut Squash, peeled, seeded, & chopped into 1/2 inch pieces
4 Cups Chicken Broth
1 lb Chicken Tenderloins
1 Tbls Olive Oil
1 Medium yellow Onion, finely chopped (OR 1 Tbls Onion Flakes)
1/2 tsp Kosher Salt
4 Garlic Cloves, minced
1 1/2 tsp dried Oregano
1 Can (14 oz) Petite Diced Tomatoes 
2/3 Cup Quinoa
8 oz Black Beans
Freshly Ground Black Pepper to taste
1 tsp Dried Parsley 

1. Steam Butternut Squash until tender. Remove half the Squash and set aside. Continue to steam the remainder of the Butternut Squash until very tender (another 5 minutes). Mash this squash with the back of a fork and set aside.
2. In a large pot bring the Chicken Broth and Chicken Tenders to a boil over medium-high heat until chicken is fully cooked. 
3. Transfer Chicken to a plate to cool and pour remaining broth into a bowl and set aside.
4. Return your pot to the stove, add in olive oil, onion. Saute until translucent. Add in Garlic and Oregano. Cook an additional minute, stirring constantly. {If using Onion Flakes, saute onion flakes, garlic, and oregano all together for a minute or two only.}
5. Add in Tomatoes, Butternut Squash pieces, and smashed Butternut Squash. Stir to combine. 
6. Stir in the reserved Chicken Broth and Quinoa. Bring to a simmer, cover and cook until Quinoa is translucent {About 15 minutes}. 
7. Shred the cooked, and cooled Chicken. 
8. Stir in Chicken, Black Beans, Pepper, and Parsley. Simmer, uncovered for several minutes until ready to serve. 

Enjoy! 


Pin It!

Sunday, September 23, 2012

Rosemary Sweet Potatoes - RECIPE!

Sweet Potatoes are my favorite... Roasted, baked, made into fries, as a casserole... just about anyway possible! I found this yummy recipe a couple weeks ago and made some tweaks to use what I had in my pantry, and to use up some of the fresh rosemary from our herb garden. Super simple!

What you need:
5 Cups Sweet Potatoes, peeled & cubed {about 2 large potatoes}
2 Tbls Olive Oil, divided
1/4 Cup Honey
3 Tbls Red Wine Vinegar
3 Tbls Fresh Rosemary, coarsely chopped
2 Garlic Cloves, minced
1/2 tsp Salt
1/2 tsp Freshly Ground Pepper


Coat cubed sweet potatoes with 1 Tbls olive oil and roast in a single layer for 35 minutes at 450 degrees {Potatoes will get slightly browned}. 
Chop your rosemary... {and make sure you use a hideous neon green chopping board...}. 
While potatoes they are roasting, whisk together 1 Tbls Olive Oil, Honey, Red Wine Vinegar, Rosemary, Garlic, Salt, and Pepper. 
Add sweet potatoes into rosemary mix and toss to coat. 
Serve immediately while hot. 

So yummy, and please don't judge them by these terrible iPhone photos I snapped super quickly while fixing dinner and holding caroline on my hip at the same time. Some times you got to do what you got to do. 


Pin It!

Monday, August 6, 2012

Walnut Zucchini Bread - RECIPE!

I've got one more delicious zucchini recipe for you... last one i promise! We're trying to use up and freeze the last of our garden abundance. 

Do you have any zucchini left to use up? If so, try this delicious, healthy, and freezable simple bread! I have already made three loaves and frozen 2 for later.

Walnut Zucchini Bread
1 cup Walnut halves
1 cup All Purpose Flour
1 cup Whole Wheat Flour
1/2 tsp Baking Powder
1/2 tsp Baking Soda
1/2 tsp Salt
1/2 cup Sugar
2 large Eggs
1/2 cup Oil
1/2 cup Plain Fat-Free Greek Yogurt
1 cup Shredded Zucchini (about 1 medium Zucchini)
Pre-heat your oven to 325 and toast some nuts for 8 minutes. {I used half pecans/ half walnuts because i ran out of walnuts! Just as yummy...} 
Dump your flours, baking soda, powder, and salt into a medium bowl and stir with a whisk to combine.
Throw your sugar, eggs, yogurt, and oil into a small bowl and stir well to combine.
Coarsely chop your toasted walnuts {or whatever nuts you have on hand}
Add your wet ingredients to your flour mix and also dump in the chopped nuts & zucchini. Stir to combine and transfer to a greased and floured 9 inch loaf pan.
{Speaking of greasing and flouring... this stuff is AMAZING! One of my favorite baking items because NOTHING ever sticks to the pan. Its the small things that get me excited :)}
Bake for 1 hour at 325. Allow to cool in pan and then enjoy or freeze for later!
Oh, and wear your sweet babe on you back, if needed, in order to make your bread in a whole, un-interrupted 15 minute period :) 


Pin It!

Saturday, July 28, 2012

my how-to for yummy homemade meals for baby caroline

Making my own baby food has been EASY! Caroline isn't consuming anything but Mama Milk yet {and we are planning to nurse full time for awhile still}, but as I blogged about earlier this week, we have had a crazy amount of garden produce! I am hoping she will enjoy {actually eat with our spitting out} some summer veggies / fruit later this fall. 

The "Super Baby Food Book" has been such a great reference! I only spent about 2 hours total and have 50 squash meals , and 32 peach meals for miss caroline neatly stored away in the freezer. 

I did a little calculating and figured out that if Caroline eats two squash cubes for a meal then it will only have cost us 0.16 cents per meal and for two peach cubes it will cost about 0.30 cents per meal. AMAZING! That beats the heck out of a $1.00+ per store bought meal/jar of baby food, AND you know your babe is getting ONLY veggies or fruit with out the preservatives or extra salt. 

Okay... what you need:
Your veggie or fruit of choice
Any seasoning you may want to add
Cutting Board & knife
Food Processor or Blender
Large Pot & water or the Pampered Chef Deep Covered Baker
Several Ice Cube trays
Glad Press & Seal wrap
Freezer Bags
Straw
We had tons of summer squash and zucchini so I am definitely hoping Caroline likes this in a couple months!
 
Chop up your squash... the smaller, the faster it will cook!
Throw all those veggies into a pot of boiling water on the stove to steam for a few minutes, or throw them into you Deep Covered Baker, with NO extra water, and then into the microwave for about 10 minutes on high until tender. This method is so healthy because all the nutrients stay in the vegetables, and the water that is created while cooking, is added with the squash into the food processor. Miss caroline will get every bit of goodness from her food!
 {I am pretty obsessed with my Pampered Chef Deep Covered Baker. Its great for many things, but with this pot, making baby food is so super easy!}
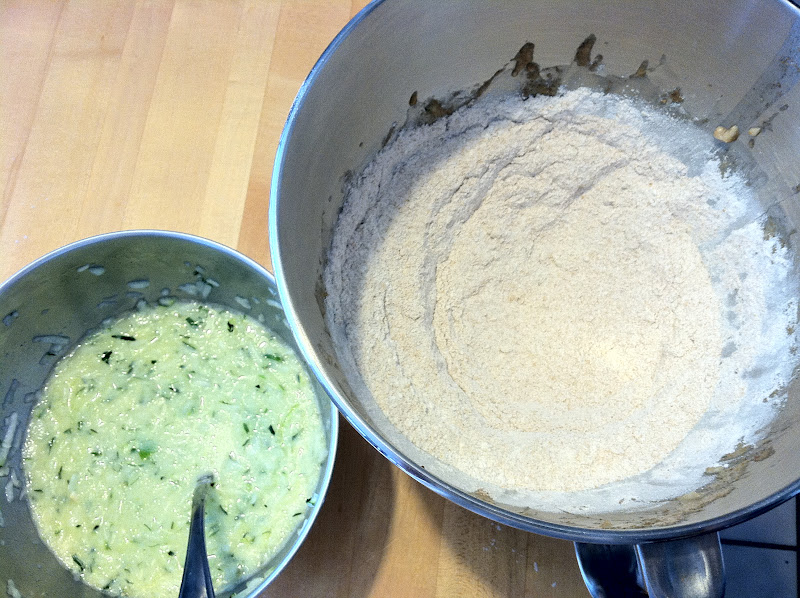
Throw all that steamed squash into your food processor, or blender, and pulse until really smooth. I added a little bit of italian seasonings because who wants bland, old, boring squash puree? Caroline won't enjoy going from flavorful breastmilk to plain liquid squash. I would say use the same seasonings in baby food that you use when cooking for yourself, because those are the flavors your babe is already use to getting in your mama milk.
Use a spoon to fill ice cube trays with your squash puree. I got these ice cube trays at the dollar store for 0.50 cents each. Each cube equals about 2 Tbl of veggie/fruit. Cover your trays with Glad Press & Seal... it seals off your trays well to avoid extra moisture and freezer burn. 

Place your squash trays into the freezer and leave about 12 hours. Once they are frozen solid, you can pop them out and put about 8 - 12 cubes in a freezer bag and store for up to 6 months! Make sure you label your bags and date them so you know what all those colorful cubes actually are :)
I used a straw to suck the extra air out of my freezer bags, and create a tight seal around each cube to keep them even fresher for longer. I also only placed about 8 cubes in a bag so that you can limit the times you have to open each bag when you are ready to use them for meals. 

We don't have any experience with the thawing process yet, but from everything I have read, thaw cubes over night in the fridge or quick thaw while sealed in the freezer bag in a bowl of room temp water. Avoid the microwave so you don't get any hot spots and burn that little one's mouth. 
I used the exact same process for peaches... Peeled, chopped, cooked in the microwave for about 10 minutes, pureed, froze in trays, and now storing in freezer bags! 
 
2-3 cubes of baby food equals about a jar of store bought baby food. It really saves SO much money, and I like the idea of knowing exactly what will be going into her tiny little body! Give it a try or pass this info onto your friends and family who have little ones. You can do the same things with most all vegetables and fruits too!

Caroline, I wonder what your favorite foods will be in the coming months?


Pin It!

Sunday, July 22, 2012

Whole Wheat Zucchini Muffins!

This is only a tiny portion of the massive amount of garden abundance we have had this year. It has been so much fun, and quite a bit of work growing a garden. I have learned SO much... made some mistakes and looking forward to planting more and differently next summer.... but overall it was a huge success! 

I have been making these delicious zucchini muffins for years. This recipe is an old Cooking Light recipe that I altered slightly. The whole wheat flour and zucchini makes them totally healthy right? {just forget the sugar :) } They are really easy to throw together, and freeze well too!
First of all shredded us some yummy zucchini {About 1 large zucchini}
 Combine your dry ingredients:
1 cup Whole Wheat Flour
2/3 cup All-Purpose Flour
1/2 cup of Sugar
1 {heaping} tsp ground Cinnamon
1 1/4 tsp Baking Powder
1/2 tsp Baking Soda
1/4 tsp Salt
Stir together with a whisk and make a well in the center.
And Combine your wet ingredients:
1 1/3 Cup Shredded Zucchini
1/2 Cup Fat-Free Milk
2 Tbls Canola Oil
2 Tbls Honey
1 large Egg

Poor into dry ingredients and stir by hand to combine completely. 
 Pour into greased muffin pans, and you can also fill mini-muffin tins too. Perfect for little mouths, and for mamas-on-the-go! 
Before popping these babies into the oven, sprinkle with a little cinnamon/ sugar mix. It gives the tops a sweet little crunch. 

Bake at 400 degrees for 15 minutes

Thats it! Love them... great way to get veggies into husband too!

Anyone else have go-to recipes for their garden goodies? Please share!


Pin It!

Friday, July 6, 2012

Yummy Chocolate Covered Pretzels & Baby Davis!

I made these pretzels for the shower we had for Hannah & Davis. Chocolate covered pretzels are a favorite in our house. I usually make them every christmas, but they really are too easy to make and too yummy to save for only christmas time.

These pretzels went perfectly with our Bee theme shower!

All you need is pretzels, a bag of white chocolate chips, bag of milk or dark chocolate chips, vegetable oil, and food coloring or sprinkles. Simple!
Heat water in a double boiler {or fill a larger pot with water and place a smaller pot on top}. Once simmering throw in the white chips. Once they start to melt add in about two tablespoons of vegetable oil. This will help liquify the chocolate a little... allow white chocolate to melt until smooth. It will take about 10 minutes or so to get the right consistency.

White chips are easy to dye any desired color. I chose yellow for our Mommy to BEE theme and only dropped in a couple drops of food coloring. 
Once melted, coat the end of the pretzel and allow to dry on wax paper or aluminum foil. To speed things up place the chocolates in the fridge! They taste good with warm melted chocolate too :)

{I have also used the pretzel twists and just drop in a handful of  whole pretzels, stir to coat, and lift out with a fork to dry}. 
To make my pretzels look like Bee's, I melted about 6 ounces of semi-sweet chocolate chips in the double boiler using the same method with about 1 tablespoon vegetable oil. I used a spoon to drizzle regular chocolate over cooled white chocolate dipped pretzels. Easy, easy, easy! 

Around Christmas I usually leave the pretzels coated in white chocolate and roll them in red or green sprinkles. Festive, and again so easy and delicious! 

Speaking of Hannah and Davis.... HE ARRIVED!!! Caroline and I happened to be in Greensboro visiting mom due to the massive power outage in virginia, so we got to meet the sweet little guy the day after he made his 8 day early arrival. 

SO PRECIOUS!
Hannah and I were eager to introduce these two cutie pies... we also began discussing their arranged marriage at the perfect age of 45 :) 

Just kidding, but seriously, it will be SO FUN for these two to have lots and lots of play dates in the coming years! 
LOVE you Hannah and Aaron and Baby Davis! Thrilled to have been able to meet you! 


Pin It!

Monday, January 30, 2012

Yummy, Easy Homemade Granola Recipe

Do y'all love granola as much as I do? Man... yogurt, granola and fresh fruit... there is almost nothing that tastes better to me for breakfast, lunch, dinner - heck really anytime these days as I find myself snacking all the time!

This recipe is really simple and great for adjusting based on your own taste preferences.
This photo turned out so terribly that I felt like you might need labels!

These are the ingredients that I used, but I think any combo of nuts, dried fruit or seeds would be terrific!

3 Cups Old Fashioned Rolled Oats
1/2 Cup Walnuts
1/2 Cup Almonds
1/2 Cup Coconut Flakes (Unsweetened)
3/4 Cup Sunflower Seeds
1/2 Cup Peanut Oil
1/2 Cup Honey (or you could use Agave)

Dump all the ingredients in a large bowl and stir to combine. Spread out in a thin layer on a parchment paper lined baking sheet.
Bake in your oven @ 250 degrees for 50 minutes. Allow to cool completely and store in an airtight container for a week or so!
Yumm-o!


Pin It!